This shirt is going to be the shirt that goes down in history for having the most refashions done to it! It started out like this....

GORGEOUS, teal black that I really did love, but every time I wore it, it felt way too black for me and I didn't feel quite right... but that teal color is my FAVORITE! I thought I could bleach it and just turn it back solid teal.....

So, I bleached it. It turned tan.

Attempted to bleach it teal with a Kelly Green and Royal Blue mixture and it turned out this color. VERY muted and I was not loving....

So in a very short period of time, it visited all 3 of these. I left it that muted green for a while, but never wore it because I really didn't like the color for me.... so why not bleach it again and try something different.
(picture forgotten here)- but I took it in it's bleached tan state and wrapped rubber-bands all over it. I tried to do it at angles so that there wouldn't be stripes straight across, I wanted lots of texture and movement, not stripes. I then stuck it in a seriously concentrated mixture of Scarlet Red dye.

This is what it looked like when all soaked in and wrapped up still. I undid all of the rubber-bands and this is what I had.

A really great rich red and tan, but it still needed to be washed at this point (yes it did fade and bleed, but whatever at this point ;-) )

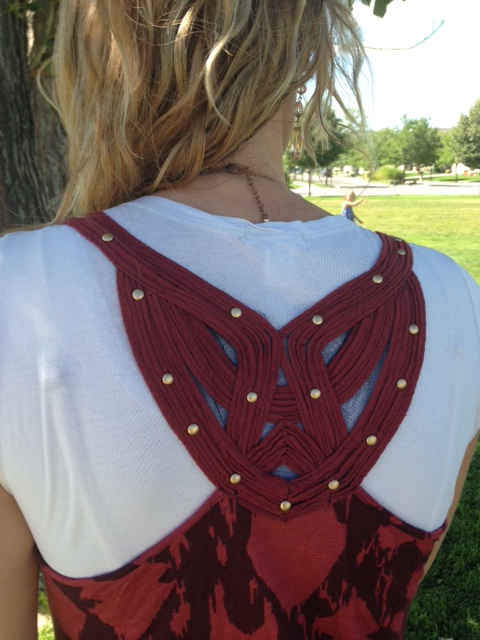
The next matter of business was the black rhinestones. I couldn't stand them anymore and decided to take my brown finger nail polish and quickly coat each one with the brown. You can see that the left upper section has brown and the right is black still. It was just that bit of change to tone it down and not be so stark.

Here is it outfitted. You can see that it did fade and I have to admit I was bummed about how much it faded.... I LOVED the deep rich red it started out to be, but sometimes it is just really hard to get the really deep coloring with dyeing. At least it is to a point that I will for sure wear it often. This shirt is so blasted soft and comfortable, that I wasn't willing to give it up.

I paired it with this fabulous belt that my neighbor picked up at the thrift store and gave to me. I didn't have to do a thing to it, it was perfect as is.... it's amazing how someone considered this trash I consider a serious SCORE! I would have paid decent money for a belt like this because it would be a staple! The boots were a great find for about $6 at a Yard Sale.... The shirt itself was a thrifted find also, originally from the Buckle I believe. A store I love but never willing to pay their prices.
So I am calling it quits for this shirt. I think 5 refashions is enough for 1 shirt. Aren't you glad you have me to make mistakes and test things out for all of you so you know what to do and what not to do..... ;-)